Briefing simulations: Setting your class up for success

Every simulation exercise should start with a brief; an explanation of what learners are expected to do and how this activity fits in with the wider context of the course they are taking. As learners (and instructors!) are sometimes anxious to start with simulations, getting off to a good start will set the right tone, puts learners in a positive frame of mind and builds credibility for the simulation exercise. This brief guide takes instructors through the three essential components of effective simulation briefs.
1. Recap concepts practiced in the simulation
Simulations are usually deployed after concepts have been discussed in a course, with learners putting into practice what they have learned. The brief is an opportunity to recap concepts and theory that learners need to be familiar with to play the simulation effectively. This can be done just before the simulation play starts or during a prior session. Many simulations can be opened and closed for play by the facilitator, giving the opportunity for learners to explore the contents by themselves on the simulation platform, without being able to start the actual simulation or to enter decisions.
On some occasions, facilitators may use a simulation as a way for learners to deduce theory for themselves. In this case, a recap of key concepts may not be needed but it can still be useful to briefly set the overall contents of what the simulation is about.
2. Explain the simulation
Learners will need to know what to do when playing. Many simulations have videos or tutorials that take learners through the simulation step-by-step. These videos or guides can be viewed again just before the simulation play or in a prior session.
An alternative, and often preferable, way of explaining the simulation is to demonstrate how the simulation works for one round of play. Not every simulation lends itself to this approach, but if possible then it affords the instructor the opportunity to spend more time on topics or decisions that are key to the particular group and its learning objectives. Such brief demos also enable the instructor to see if there are any questions or topics that require clarification. Showing the simulation in class is also an opportunity to get learners positively engaged with the exercise they are about to start.
3. Clarify expectations
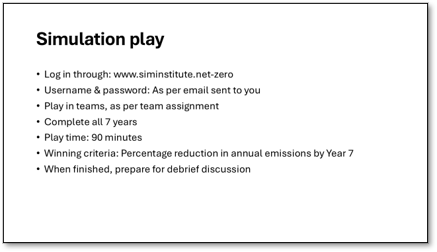
The final step is toclarify what learners are expected to do. If there are technical difficultiesand lengthy discussions on how to log in, the energy in the room goes downquickly. A simple picture like the one below provides all the key information.
This part of the brief also includes clarification on if & how the simulation exercise is taken into account in grading or assessment of learning.
Completing these three steps can often be done in around 15 minutes, especially if no new materials need to be covered in the beginning. If a simulation exercise is divided over several class sessions, it is recommended to start each session with a short brief to provide a reminder of the context of the exercise that learners are about to undertake, and to see if there are any questions.
When all is said and done, the instructor can reinforce that the simulation is a new and enjoyable way of learning for many and that those who fully invest themselves in the exercise will get the most benefit out of it. After that, the role of the instructor switches to being a ‘guide by the side’, monitoring progress and providing support, while avoiding over-interference in the learning experience.
Check our recent article on debriefing simulations.